


A couple of months back I wrote an article on [Deploying the right way?](https://blog.jacobtan.co/deploying-the-right-way/); It was a thought piece which covered if there were a correct way to deploy your application, and came to the conclusion that there was no one right way to deploy.
Funny thing is, I was doing maintenance for one of my side projects, and decided that I should automate my deployment process. I am using Gitlab to host my repositories and Digitalocean to host the sites.
Why? It pretty much boils down to
- I get to learn how to deploy from Gitlab to Digitalocean (Learning yay!)
- Easier deployment, no more building locally and copy pasting the
distfolder - Sharing my learning process
So, while I try to not do so much of tutorial type of articles, I think it would be good to share my journey on how to deploy from Gitlab to Digitalocean.
Current Setup
I am not proud of my current setup for deployment; it was me building the application locally, and copying it from local to DO droplet via FTP; crude but it works.
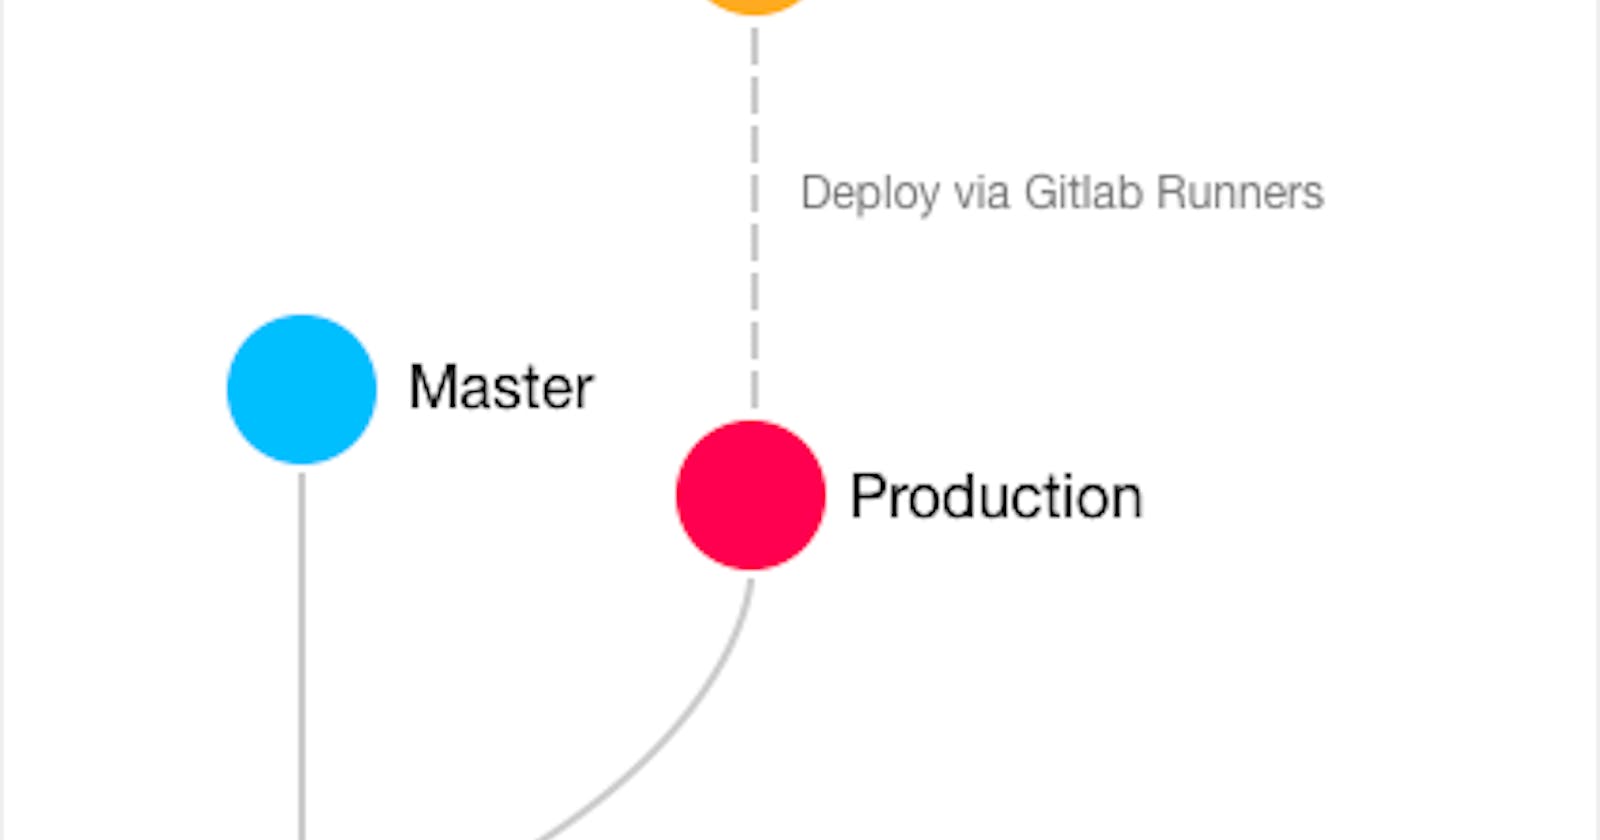
The end goal I had in mind was to deploy my application from only my production branch when changes are made to it. I can still have feature branches to work on new features and not worry about it being integrated into my production branch.
The production branch would then deploy the application straight into a folder that I currently have in my droplet that serves the page.
Simplified view of deployment
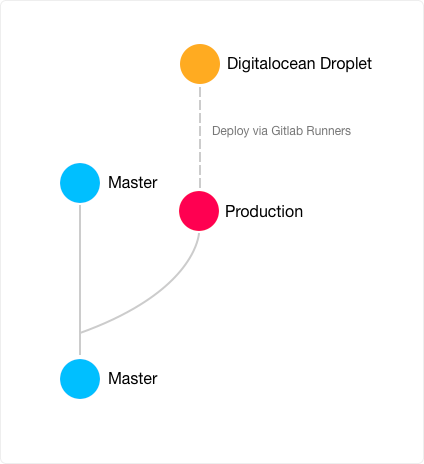
Done using Framer :D
Moving from manual to Continuous deployment
In order to achieve this, I would need to set up a Continuous Deployment (CD) pipeline on Gitlab to DO.
Gitlab-ci.yml file
image: node:8.9.0

cache:
  paths:
    - node_modules/

stages:
  - deploy

before_script:
  # Check for ssh-agent + rsync and install if not present
  - "which ssh-agent || ( apt-get update -y && apt-get install openssh-client -y  )"
  - "which rsync || ( apt-get update -y && apt-get install rsync -y )"
  - eval $(ssh-agent -s)
  # Inject the remote's private key
  - echo "$SSH_PRIVATE_KEY" | tr -d '\\r' | ssh-add - > /dev/null
  - mkdir -p ~/.ssh
  - chmod 700 ~/.ssh
  # Append keyscan output into known hosts
  - ssh-keyscan $SERVER_IP >> ~/.ssh/known_hosts
  - chmod 644 ~/.ssh/known_hosts
  - npm install
  - npm run build

deploy:
  stage: deploy
  script:
    - rsync -avuz --exclude=".*" $CI_PROJECT_DIR/dist/ $SERVER_USER@$SERVER_IP:/var/www/watchcrypto.today
    # Non interactive ssh gracefully reloads server
    - ssh $SERVER_USER@$SERVER_IP '. /etc/profile; pm2 reload all'
  only:
    # Trigger deployments only from production branch
    - production
In Gitlab's CI/CD, pipelines are configured using a YAML file known as .gitlab-ci.yml within each project.
This file tells Gitlab's runner what to do and when to execute. For my own YAML file, I would trigger deployments only when there is a change to the production branch.
In my own yml file, there are a few variables that are used. This are stored in the project as environment variables and will be only applied when the runner is running.
Having it stored as environmental variables means being able to reuse the YAML file, as well as keeping your secrets safe rather than have it included in the YAML file as plaintext.
The following enivornment variables required for this deployment:
$SSH_PRIVATE_KEY - We will need to generate this
$SERVER_IP - Get this from DO
$SERVER_USER - and this value from DO as well
$CI_PROJECT_DIR - Provided by Gitlab by default
A list of variables that are being used by Gitlab can be found here.
You may also notice this line here:
$ - rsync -avuz --exclude=".*" $CI_PROJECT_DIR/dist/ $SERVER_USER@$SERVER_IP:/var/www/watchcrypto.today
Which is a rsync command that will remotely sync the distribution folder from my CI Project directory to my DO's folder that I am serving the project from. In this case, it would be the watchcrypto.today folder.
DigitalOcean
Now over at my DO droplet, there are a few things that are required.
Create a non-root user for deployment. We want to use a non-root user purely for deploying the application.
Generate SSH keys on the droplet with ssh-keygen
You'll need the private key, which can be viewed using the command below:
$ cat ˜/.ssh/id_rsa
Installation of pm2
While it is not necessary for static sites or Single Page Applications, I also installed pm2, a daemon process manager for node.js that will help you manage and keep your application online.
This can be installed using the following command
$ npm install pm2@latest -g
Gitlab
Navigate to:
> Settings > CI / CD > Variables
Remember the environment variables used in the gitlab-ci.yml file? We will need to create them here.
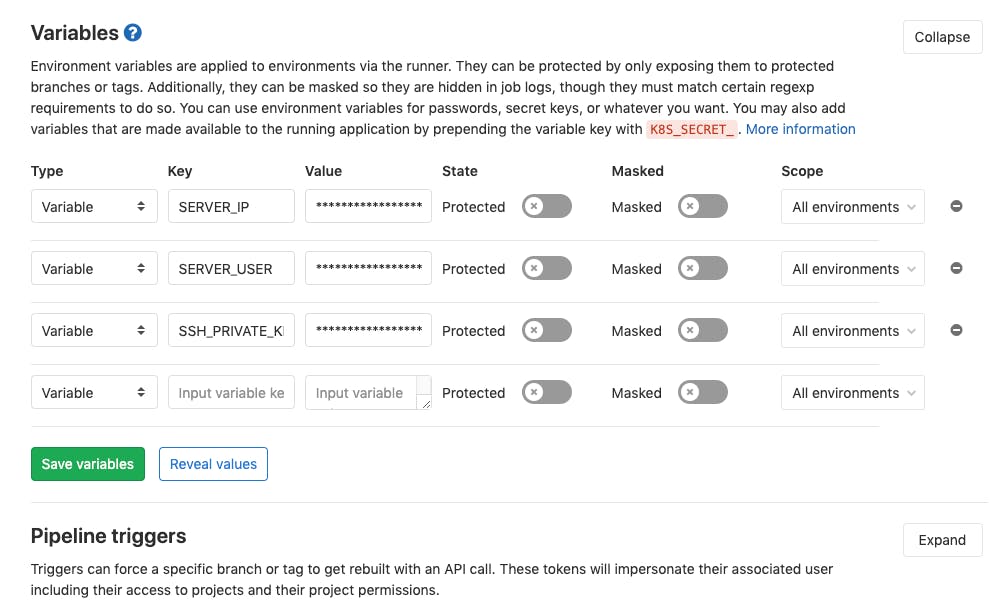
Click on the Save variables button to save it or else the YAML file would not know what to reference to!
Onwards to deployment
Now we have done the necessary steps required for CD, it's time to deploy our application.
I switched from master branch to production, rebased master, and ran
$ <production branch>: git push origin HEAD
This pushes my branch to Gitlab's repostiory, which will kick off Gitlab's runner.
The deploy will fail the first time as pm2 has not been started. So back at DO's droplet, navigate to your project directory and run
$ pm2 start index.html # Or index.js if you have a nodeJS application
Now redeploy the same branch, and navigating to Gitlab's CI/CD jobs page, you will see the following below:
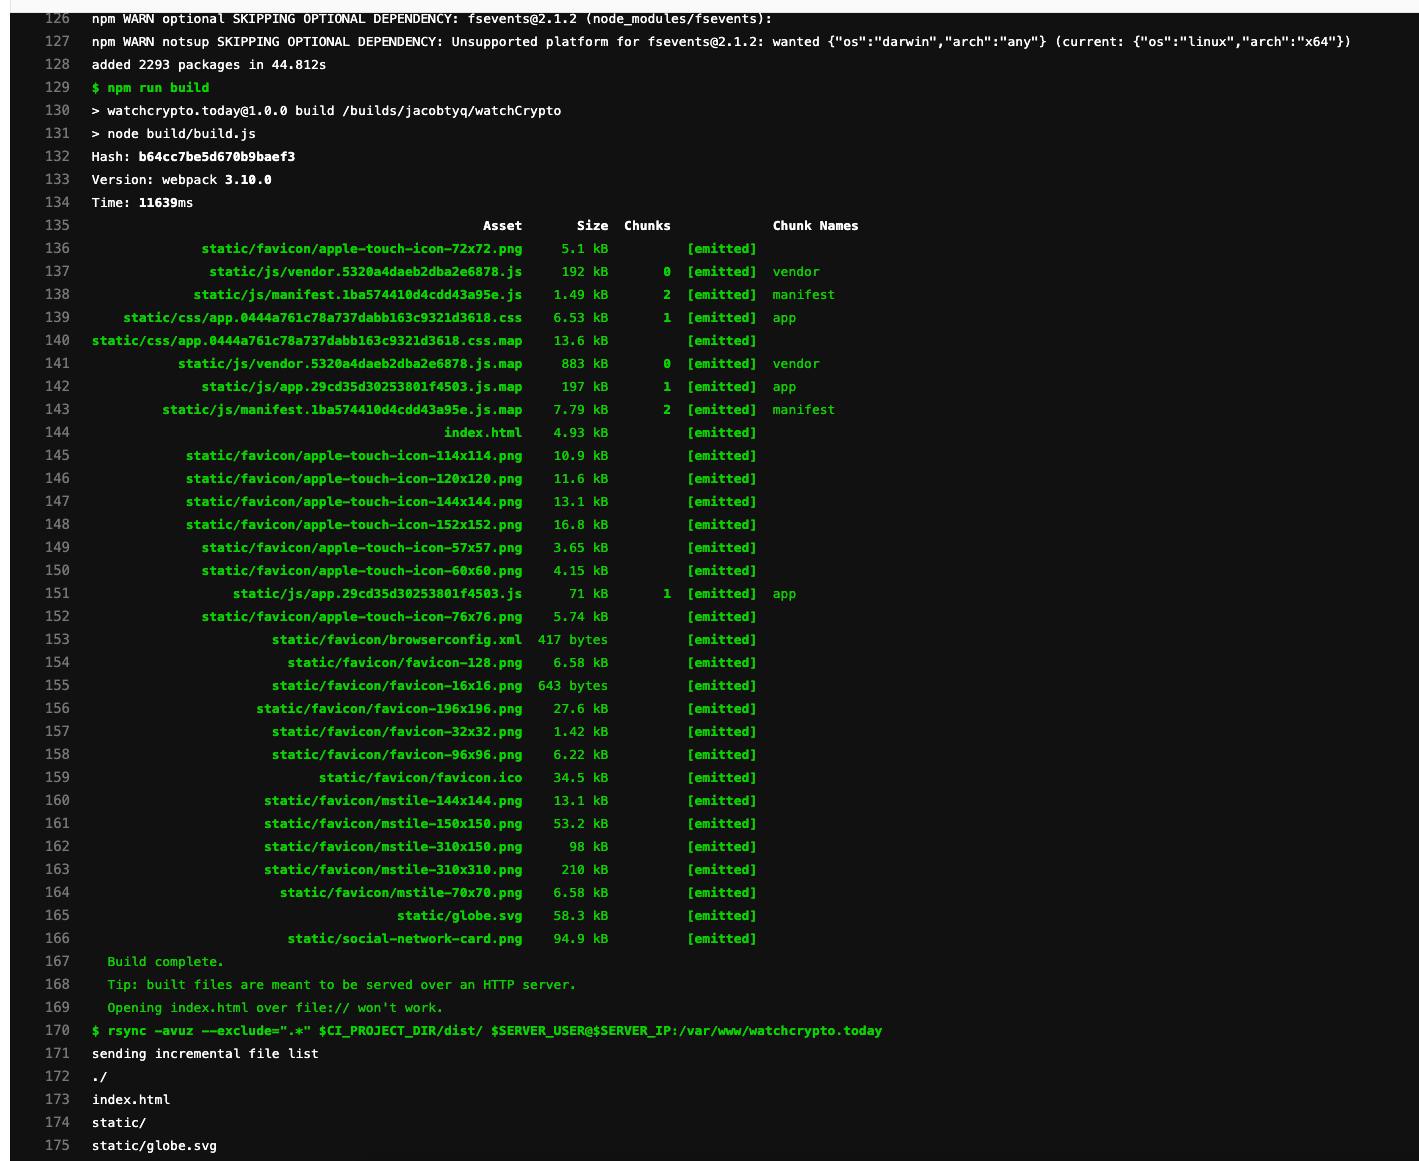
This means that Gitlab has successfully deployed your application onto your Digitalocean droplet!
Summary
While it is not necessary to set up a CD process if your project does not require it, I would still recommend trying it out at least once to understand how CD would work.
I might want to try deploying on multiple droplets next... 🤓